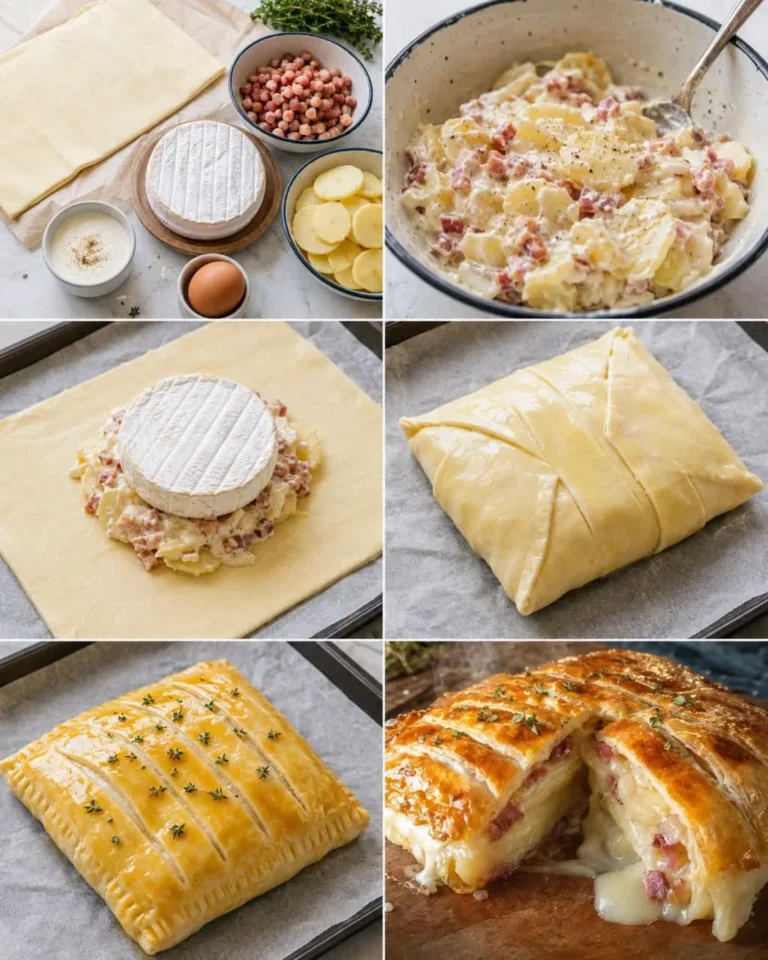
ensures a melt-in-the-mouth, soft, and well-balanced center when the pastry is sliced.
Always keep the edges clean. If cheese or cream touches the seam area, the seal won’t hold properly, and the pastry might burst open during baking.
4. Seal with the second sheet of pastry
Lightly moisten the exposed edges of the bottom pastry sheet with a little water or a damp finger. Place the second sheet of pastry on top, ensuring it lies flat and aligning the edges as precisely as possible.
Gently press the air out from around the filling using the palm of your hand, taking care not to crush the puff pastry. Then, seal the entire edge by pressing down with your fingertips.
For a neater finish, you can fold the edge slightly inward or press it down with the tines of a fork. This simple step also helps keep the filling secure during baking.
If you prefer a more rustic look, you can create a small rim around the edge, but avoid making the seam too thick, or it won’t bake evenly.
5. Crimping for a beautiful finish
Crimping gives the pastry a truly elegant, homemade look. Using the tip of a knife, make small, evenly spaced, angled incisions along the edge, all the way around the seam. This isn’t just decorative: it helps steam escape cleanly and prevents the pastry from deforming unevenly. Work gently so you don’t cut the seam too deeply.
6. Glaze and score the surface
Beat the egg in a small bowl. Using a brush, apply a thin, even layer over the surface of the puff pastry. A light coating is enough to achieve a beautiful, glossy amber finish.
Next, use the tip of a knife to make a few decorative scores on top. Make fine lines without cutting